VMware NSX 4 vCenter Plugin – A closer look at the plugin and its caveats
The VMware NSX vCenter plugin was first released with VMware NSX 3.2. The plugin makes it substantially easier to adopt and deploy VMware NSX for a vCenter administrator. There are some caveats to deploying NSX this way, regardless of which mode you chose to deploy; Security Only or Virtual Networking.
The deployment modes, workflow and requirements have been covered in an earlier video (available below). In this article, we focus on demonstrating the caveats of each deployment mode, and supporting administrators to make an informed decision on which mode to choose.
Security Only Mode
As the above video demonstrated, this mode enables vCenter / vSphere administrators to deploy VMware NSX using a single OVA (not a cluster of 3) and integrate it into vCenter. Administrators are not required to configure VMware NSX VLAN-Backed Segments or Overlay networks. The plugin enables NSX to directly integrate with vCenter, which results in administrators being able to apply Distributed Firewall (DFW) policy on vSphere Distributed Switch (vDS) portgroups.
- When this mode is deployed, hosts are prepared for NSX, which means NSX Manager pushes NSX vibs onto the hosts / cluster selected.
- Next, the wizard allows administrators to create infrastructure, environment, and application groups.
- Finally, administrators are required to define DFW policy (communication flow).
The below workflow diagram depicts the deployment of the Security Only mode.
Note: Deploying this mode initiates a very specific workflow that discovers vDS portgroups in vCenter and syncs them with NSX Manager. This workflow makes applying DFW policy on vDS portgroups possible. This is not possible in the Virtual Networking mode.
Configuration Deep-Dive
When this mode is deployed, a special system owned VLAN transport zone is created, associated with a transport node profile and attached to the cluster.

As this is a system owned transport zone, you are not able to attach it to any other hosts or modify it in any way, a few examples/ scenarios are provided below.
Example 1: Re-using the Transport Zone
You cannot attach the Transport Zone to neither another Transport Node Profile (TNP) nor a vSphere cluster. This is also the case if you attempt to attach the Transport Zone to an individual host directly.
Example 2: Change From Security Only to Virtual Networking
As the Transport Zone cannot be re-used, this means you cannot move from Security Only to Virtual Networking + Security. The rationale behind wanting to change modes could be; Security Only mode enables administrators to apply policy to vDS portgroups only, users may want to take advantage of both modes, they may also wish to use Overlay networks.
Could you not first apply this mode, then modify the transport node profile, add an Overlay Transport Zone and enable Tunnel Endpoints? The answer is NO, the Transport Node Profile that is configured as part of this mode is not editable, see the image below.

Note: the edit option is greyed out.
Example 3: Attempting to detach then attach the VLAN TZ
What if you were to remove the Transport Zone from the hosts / cluster it is attached to and then attempt to create another profile with an Overlay and the system VLAN Transport Zone?
As the cluster has a Transport Node Profile attached, you can either pick another Transport Node Profile, by selecting configure OR remove NSX altogether, modify then attach.
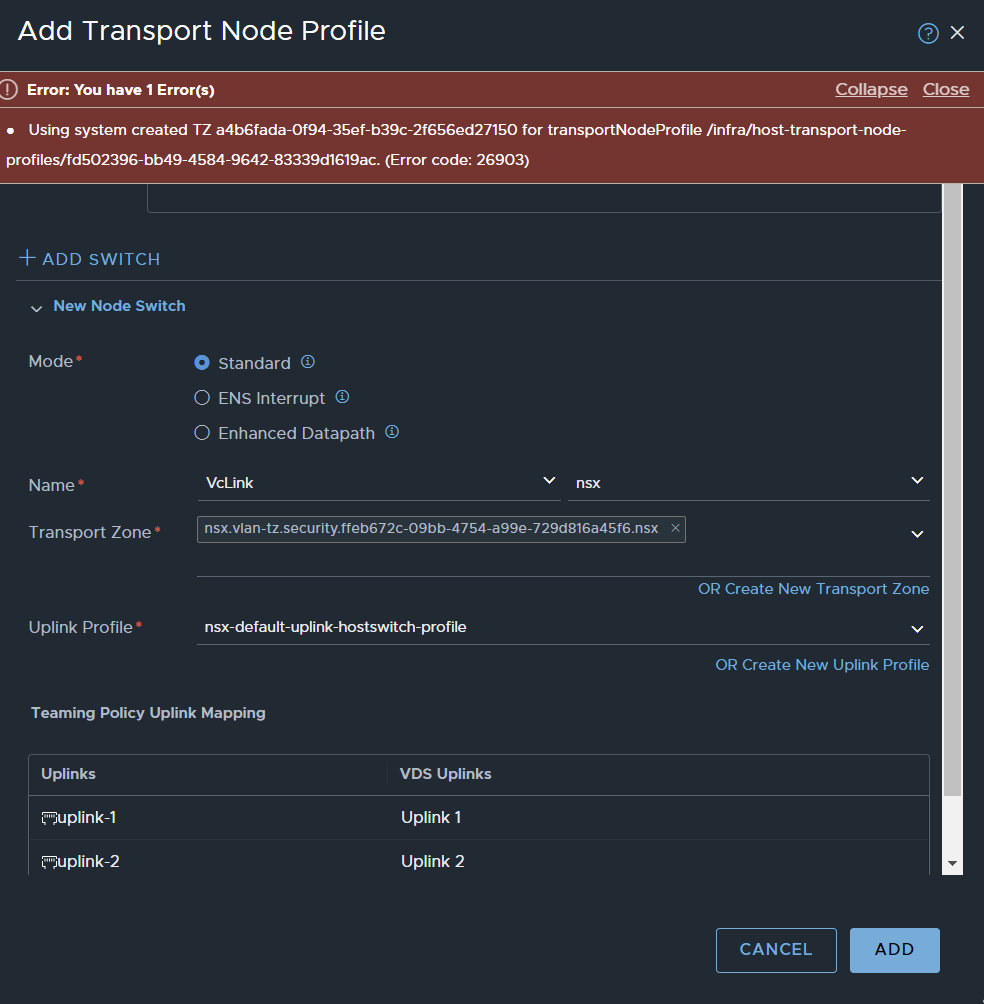
- The first option is not feasible as the system owned VLAN Transport Zone cannot be added to another Transport Node Profile, you will be prompted with an error.l
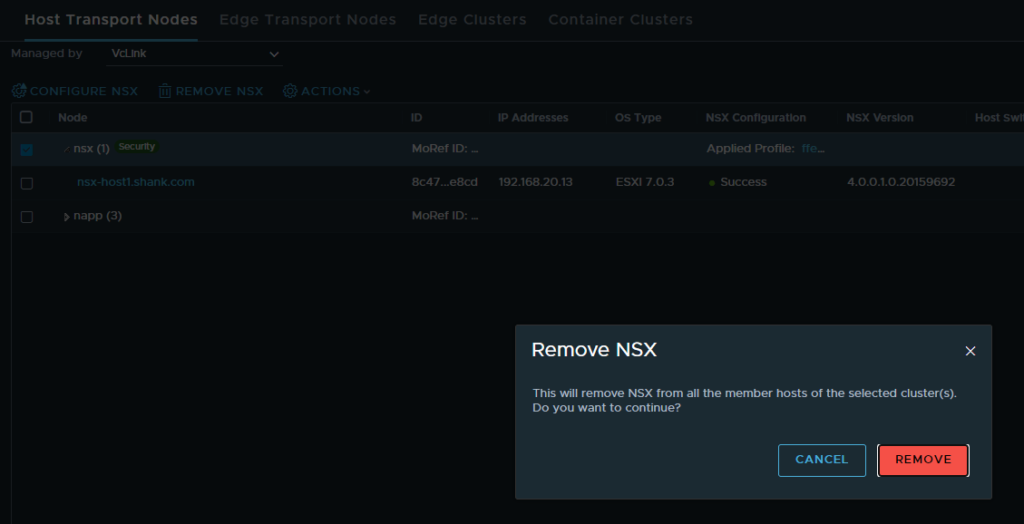
- The second option is also not feasible either as all configurations that are part of the workflow are deleted when NSW is removed. This has been illustrated in the screenshots below.
Start the removal process, remember, this also uninstalls NSX off the host.
The cluster uninstall is now complete.

Now we’ll attempt to create a new Transport Node Profile with the system owned VLAN Transport Zone.

Hang on… after uninstalling NSX, the system created Transport Zone has disappeared. What happens to all those vDS portgroups that were attached to the Transport Zone? Let’s check.
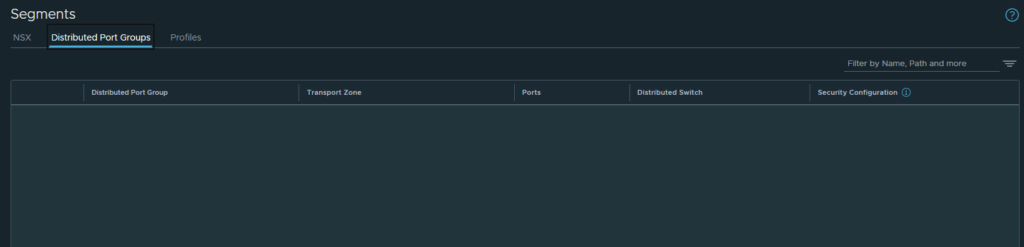
Looks like they are gone as well.
From this we can glean that administrators are NOT able to remove NSX from the cluster, as doing so removes all configuration (Transport Zone and vDS portgroups) from NSX. There is no way to reverse this, outside of re-integrating and re-deploying with Security Only mode.
The next section will quickly touch on the Virtual Networking mode to highlight the differences.
Virtual Networking Mode
The below workflow diagram depicts the deployment of the Virtual Networking mode.
When deploying this mode, two new Transport Zones are created.
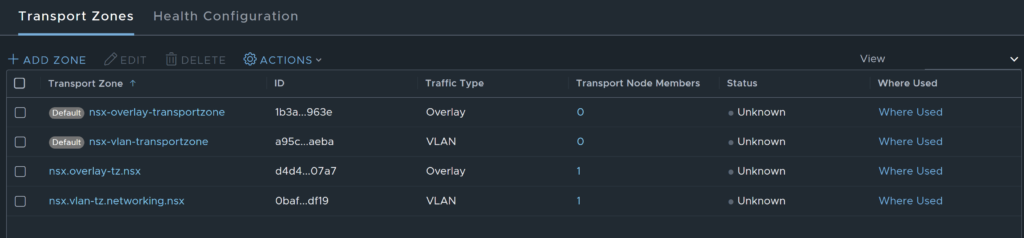
Unlike Security Only mode, Virtual Networking mode allows the cluster to be edited.
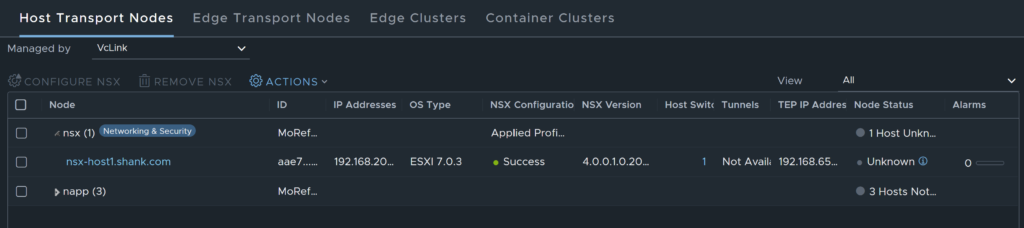
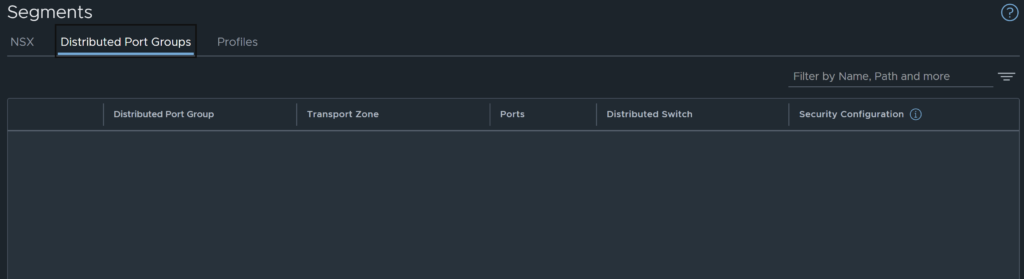
As can be seen below, no vDS portgroups are discovered, and there is no way to discover them once Virtual Networking mode was selected.
Unlike Security Only mode removing the TNP / un-preparing the hosts does not remove the created transport zones. This mode deploys a typical VLAN and Overlay Transport Zone, this is the reason the cluster configuration can be edited in this mode.
Summary
This post and the related video aims to provide administrators with knowledge of the VMware NSX vCenter plugin. It also aims to ensure users are aware of the caveats of each mode, which in turn should assist with design requirements and decisions.